The first time I deposited funds into RedotPay, I almost lost my USDT. At first, I thought it was a platform issue, but it turned out that I had selected the wrong network. So today, I want to share my experience to help you avoid the same mistake.
Before You Deposit
Supported Cryptocurrencies
RedotPay supports multiple assets, including:
- USDT (Tether) – the most popular option
- USDC
- BTC
- ETH
- And several other cryptocurrencies
Why I Recommend USDT
In general, USDT is the best choice for beginners. It’s a stablecoin, so its value doesn’t fluctuate much. At the same time, fees are relatively low, especially on the TRC20 network, where transfers usually cost only $1–2.
Step-by-Step Deposit Guide
Step 1: Get Your Deposit Address
In the RedotPay app:
- Tap “Deposit”
- Select your coin (e.g., USDT)
- Choose the network (very important)
- Copy the deposit address
Step 2: Withdraw from Your Exchange
For example:
- Go to the Withdraw page
- Paste your RedotPay deposit address
- Select the same network (this is critical)
- Enter the amount
- Confirm the transfer
Step 3: Wait for Confirmation
Depending on the network, arrival times may vary:
- TRC20: usually 5–15 minutes
- ERC20: may take longer
- BEP20: relatively fast
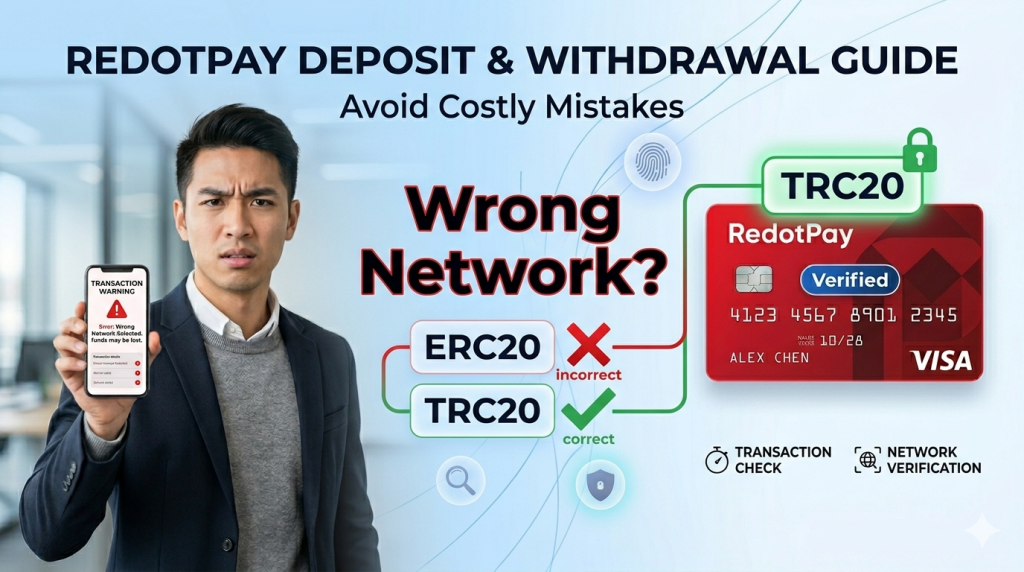
Network Selection Guide
TRC20 (Recommended)
- Low fees (around 1 USDT)
- Fast confirmation
- Most commonly used
ERC20
- Runs on Ethereum
- Higher fees (often $5–20)
- More suitable for larger transfers
BEP20
- Binance Smart Chain
- Moderate fees
- A solid alternative
Overall, TRC20 works best for small transfers, while other networks may be considered for larger amounts.
My “Almost Lost Funds” Experience
Once, I copied a TRC20 address but accidentally selected the ERC20 network when withdrawing. I didn’t notice the mistake until after the transaction was sent, which was quite stressful.
Luckily, the funds eventually arrived. However, this is not always guaranteed.
The lesson here is simple: always double-check that the network matches before sending.
What If Your Deposit Doesn’t Arrive?
If your deposit hasn’t arrived, don’t panic. Instead, go through the following steps:
- Check the transaction status to confirm it was sent successfully
- Verify that the network matches the address
- Wait a bit longer in case of network congestion
- Track the transaction hash (TXID) using a blockchain explorer
If the network was incorrect, you may need to contact RedotPay support. In some cases, recovery is possible, but it’s not guaranteed.
Withdrawal Guide
To withdraw from RedotPay to another wallet or exchange:
- Tap “Withdraw”
- Select the coin and network
- Enter the destination address
- Input the amount
- Confirm and complete verification
Important Notes
- First-time withdrawals may require additional verification
- There is usually a minimum withdrawal amount
- Fees are deducted from the withdrawal
ATM Withdrawals (Physical Card Only)
If you have a physical card, you can withdraw cash from Visa-supported ATMs.
Fees
- Fixed fee: around $2
- Percentage fee: around 2%
- Additional ATM operator fees may apply
Because of these costs, it’s better to limit ATM withdrawals unless necessary.
Internal Transfers
RedotPay also supports transfers between users. Fees are usually very low or even free, which makes it convenient for splitting bills or sending money to friends.
Security Tips
To reduce risks:
- Start with a small test transfer
- Double-check addresses before sending
- Save transaction records or screenshots
- Enable transaction notifications
About Card Application
Once your deposit is successful, you can apply for a card.
If you haven’t applied yet, you can use these promo codes:
- OPENCLAW – Virtual Card (20% OFF)
- AIAGENT – Physical Card (20% OFF)
Final Thoughts
Depositing and withdrawing funds is not complicated, but small mistakes can lead to big problems.
So it’s important to:
- Choose the correct network
- Double-check the address
- Start with small amounts
- Be patient during confirmation
Hopefully, this guide helps you avoid unnecessary risks.
Disclaimer: Cryptocurrency transfers involve risk. This guide is based on personal experience, and actual rules may vary. Always refer to official information before making transactions.